wooden synth demo from ranjit on Vimeo.

all the parts in the kit
Check your parts! Look at the picture above – you should have:
- 8 wooden music gears
- one clear plastic drive gear
- two plastic bearings
- one steel shaft
- a pile of about 30 wooden spacers
- stand: two wood tombstone shapes and two long wood rectangles
- motor bracket: three wood ovals, three little metal bolts (two long and one short), some nuts and washers, and a thumb nut. There may be some extra nuts and washers in case one goes missing.
- motor and battery pack
- one NYC subway metrocard, used (not pictured)
Note: the wood parts are a bit delicate – be careful, especially when putting the wooden gears on the shaft.
Assemble the motor bracket

parts of the motor bracket
Put one of the little nuts onto the end of the short bolt, and stick it in the gap in one of the three motor bracket ovals.
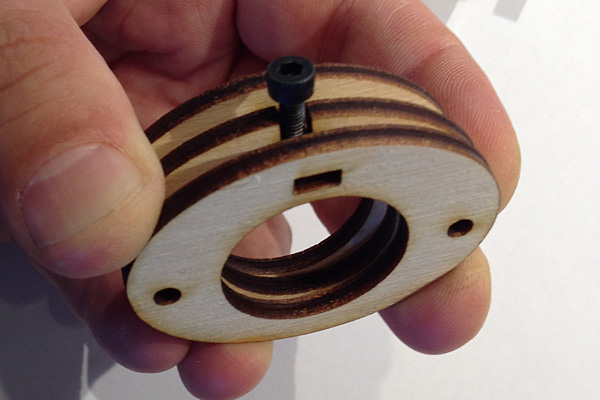
assembling the three layers of the motor bracket
Assemble the three layers of the motor bracket as shown, so that the holes line up, and the layer with the bolt in it is in the middle.
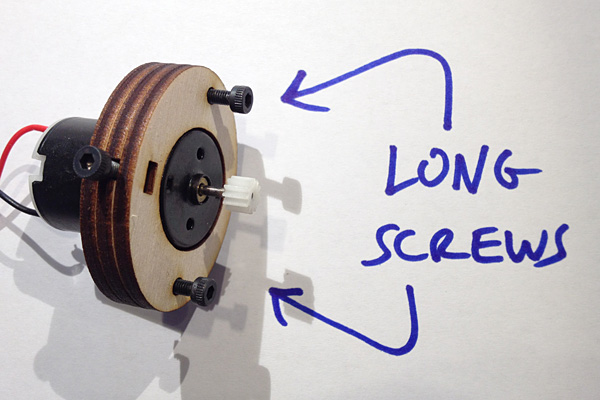
long bolts and motor in the motor bracket
Put the two long bolts into the motor bracket to keep the three layers lined up nicely, and then put the motor into the bracket so that its face is flush with the front of the bracket.
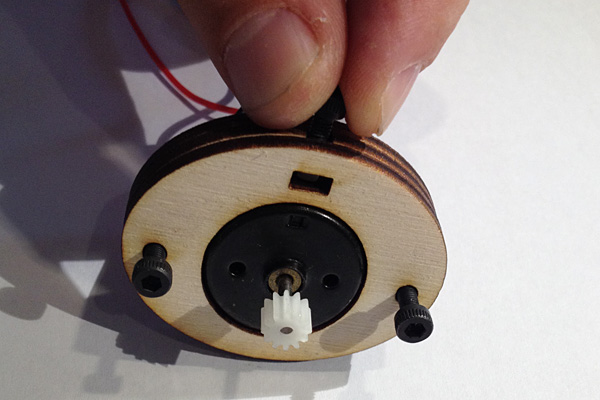
tightening the motor bracket
Gently turn the screw so that it presses down against the motor and holds it in place. It doesn’t need to be super tight.
Remove the two long bolts and save them for later.
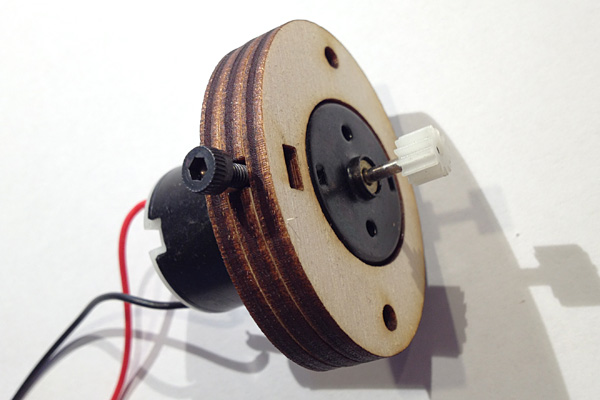
motor bracket without long bolts
Assemble the gear shaft
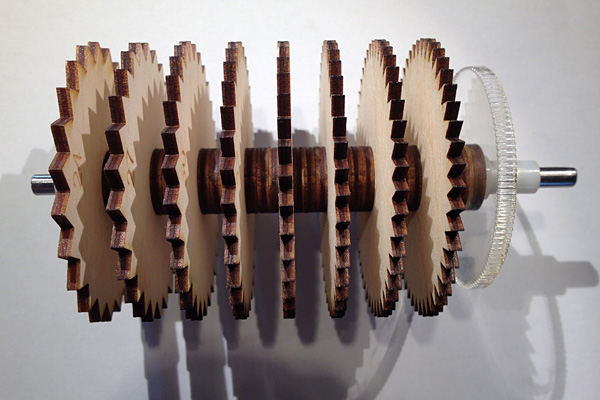
finished gear shaft
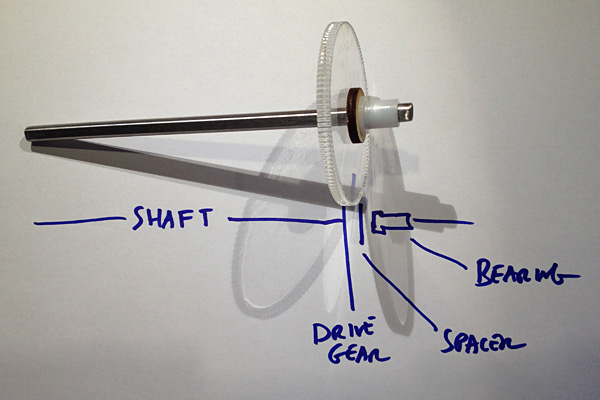
shaft with drive gear, spacer, and bearing
Start by sliding the clear plastic drive gear onto the shaft so that it’s about one inch from the end. Add one wooden spacer ring and a bearing, and it should look about like the picture. It doesn’t have to be exact.
The bearing is loose and will want to fall off, so take it off now and save it with the other one for later.
If the wooden spacer is loose and keeps falling off, use a bit of tape to stick it in place for now.
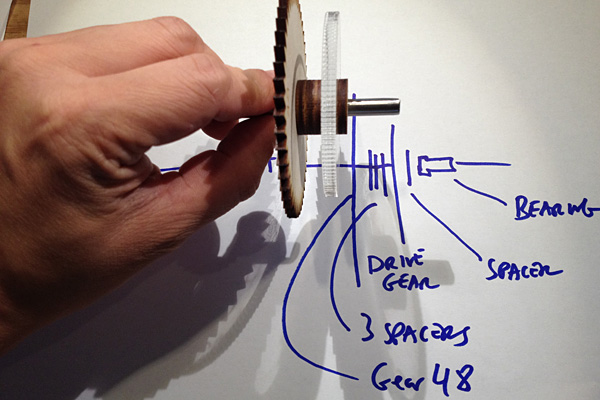
shaft with the first music gear
Starting from the other end of the shaft, add three spacers, and then add the 48-tooth music gear (it has the number 48 printed on it). If it’s a tight fit, press it on carefully, using pressure near the center of the gear instead of out towards the teeth.

shaft with two music gears
Add three more spacers and the 45-tooth gear.
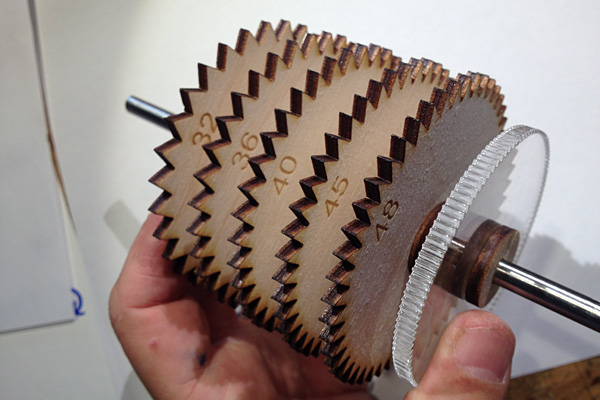
shaft with five music gears
Keep adding the music gears to the shaft in descending order, always with 3 spacers in between them.
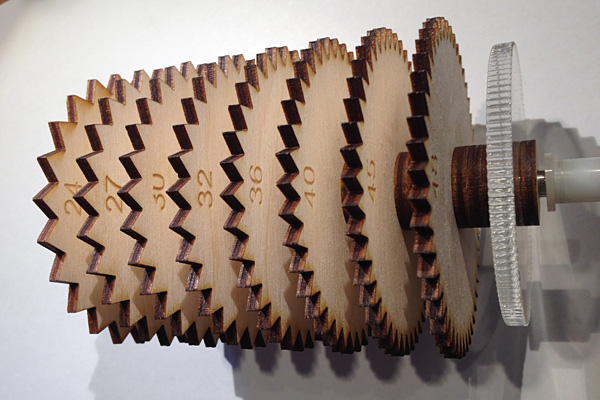
shaft with all music gears
Here’s what it’ll look like when you’re done, with the gears from left to right: 24, 27, 30, 32, 36, 40, 45, 48.
There will be some extra spacers – there’s definitely more than you need in the kit, but don’t throw away the extras yet!

finished gear shaft
Assemble the stand
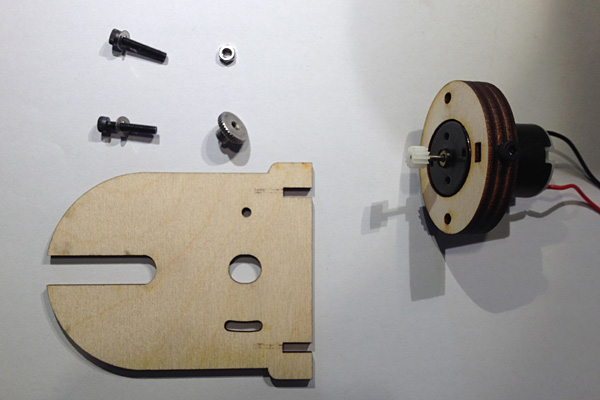
motor stand and motor
Here’s the parts for the motor side of the stand. The motor’s little gear goes through the jelly-bean-shaped hole in the middle of the stand.
Put a little washer onto each of the two bolts, and get a little nut and the big thumb nut ready.
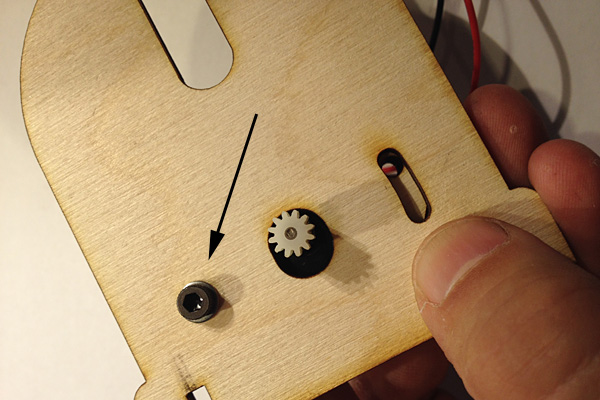
first bolt attaching motor bracket to stand
Put a bolt through the little hole in the stand into the matching hole in the oval motor bracket.
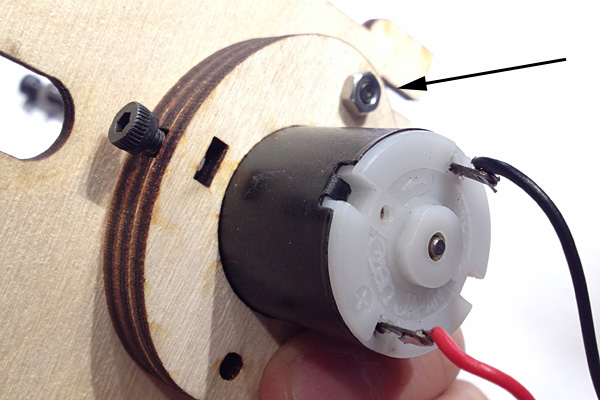
nut on first bracket bolt
Put a little nut on the end of the bolt. It doesn’t need to be really tight – finger pressure will do; no need for a wrench.

second bolt
Put the second bolt through the curved hole in the stand, into the matching hole in the motor bracket.
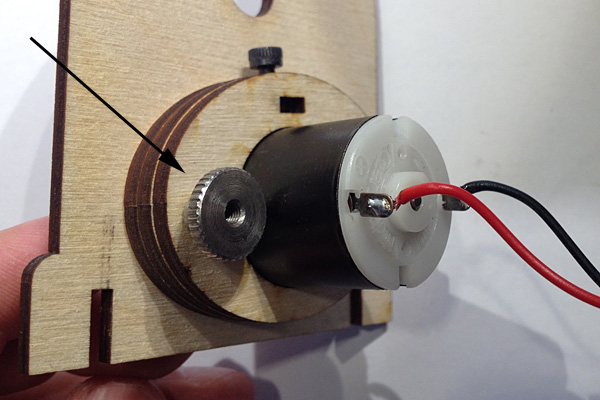
bolt with thumb nut
Screw the thumb nut gently onto the other end of the second bolt.

partially assembled stand
Assemble the stand by carefully fitting the slots in the two end pieces into the slots into the two long rectangular pieces.

fully assembled stand
Completed wooden synth!

all together now
Put the two plastic bearings on the two ends of the shaft with their rims inward, and then drop the shaft shaft into the stand so that the clear plastic drive gear rests on the motor’s gear.
If there’s room for the shaft to slide back and forth in the stand: take off the bearing from the end of the shaft opposite the drive gear, and add a few extra wood spacers to the end of the shaft before putting the bearing back. It should fit pretty snugly, but not tightly.
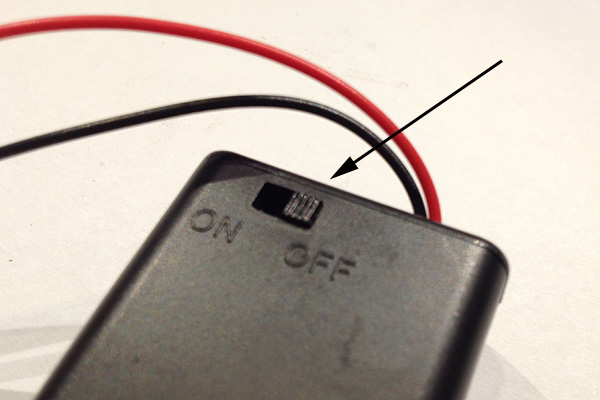
on-off switch
Make sure the power switch on the battery pack is turned off.
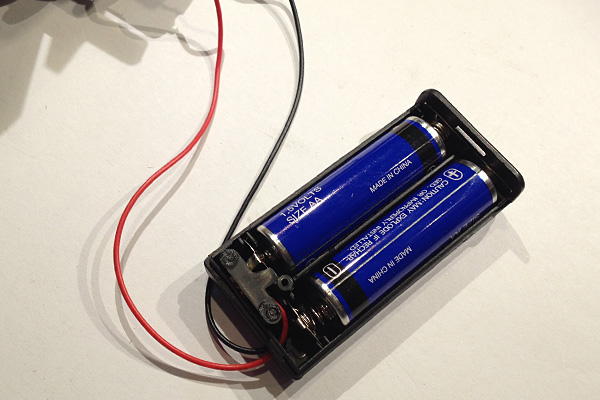
battery case with batteries
Use a fine philips head screwdriver to remove the screw from the battery case, and put in two AA batteries as indicated by the markings in the battery case.
Give it a try!
Before you turn it on, loosen the thumb nut and try to wiggle the motor up and down so that the drive gear just meshes with the motor gear. Tighten up the thumb nut and turn it on!
If the shaft doesn’t turn at all, your motor is too low. If it makes a loud screeching noise, the motor is a little too low or too high. By loosening the thumb nut, you should be able to adjust the height of the motor up and down a little until the shaft turns smoothly and the gears mesh pleasantly.
Now you can play your wooden synth by gently pressing the Metrocard or other bits of card or paper against the gears as they spin. Different materials make different sounding tones – see the video above for an example.
This instrument is awesome and I built it with the help of my friend Stephen.
Bart Hopkins’ very similar instrument Savart’s Wheel uses plastic cups as the “pickups”. http://windworld.com/bart/invented-instruments/